
Henrik Voss, Senior Health and Science Editor.
There is a particular kind of guilt that lives in a bathroom cabinet: the little dish of makeup sponges, some pristine, some the colour of weak tea, one with a corner bitten off by nobody knows what. You reach for whichever one is driest, because drier feels cleaner, and by midday your foundation has settled into every pore around your nose. The sponge is rarely the villain you think it is. Most patchiness, streaking and product waste comes down to how the sponge is used, not which one you own. A wet cellulose sponge can hold up to eighteen times its dry volume in water before it ever meets your foundation, which is the single fact that explains almost everything that follows.
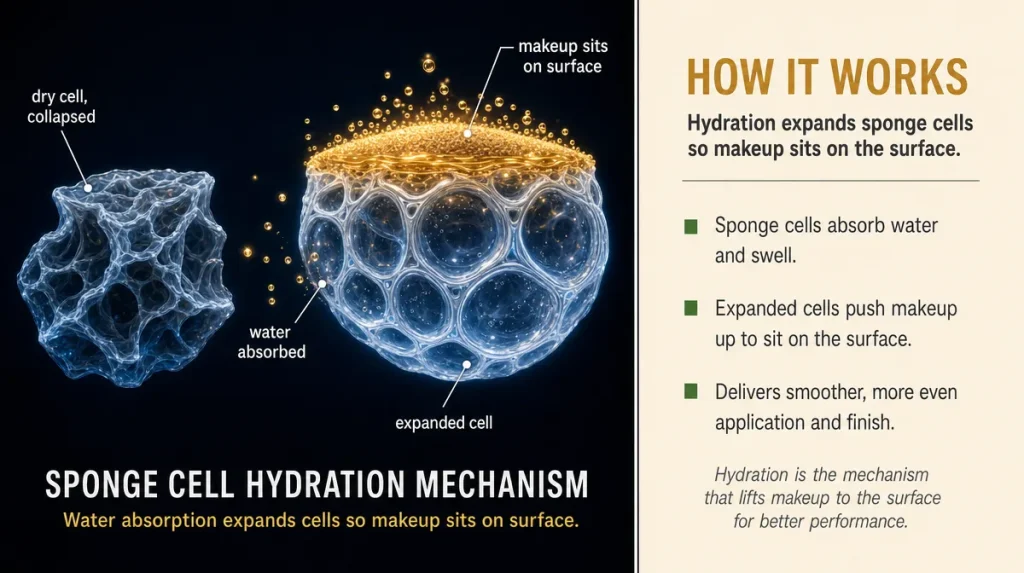
- Wet before you touch product: a properly soaked sponge expands its cells with water, so it absorbs far less foundation and leaves more on your skin instead of in the sponge.
- Bounce, do not drag: a stippling motion pushes product into skin without disturbing what is underneath, which is why dragging is the single biggest cause of streaking.
- Judge replacement by smell and structure, not colour: a stained sponge can still be sound, but one that has gone dense, torn or sour needs to go regardless of how new it looks.
Why The Sponge In Your Dish Is Working Against You
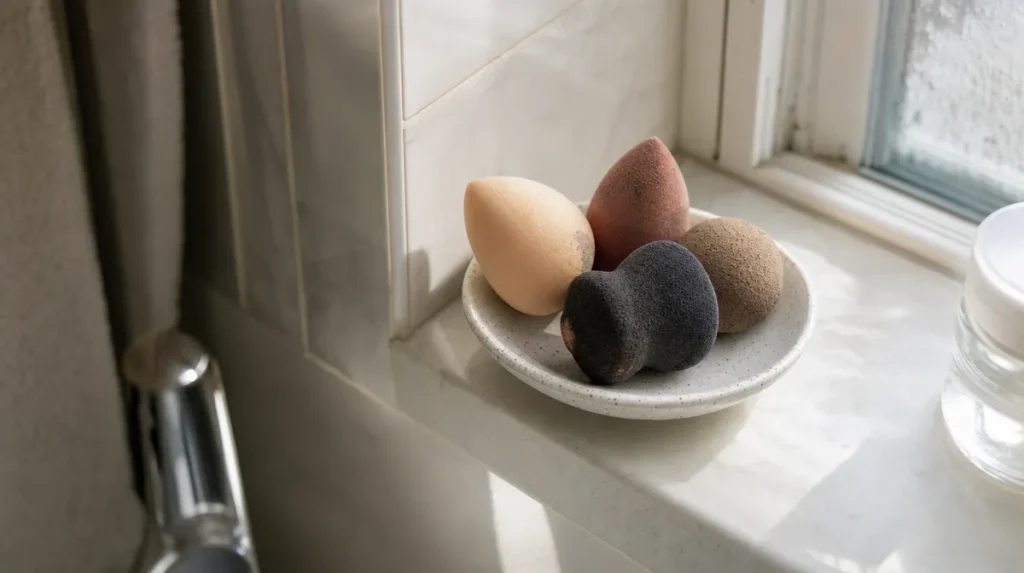
A dry sponge behaves like a dry kitchen cloth: the first thing it meets, it soaks up wholesale. Press a bone-dry sponge into liquid foundation and the sponge, not your face, becomes the main beneficiary of the bottle. This is the most common reason people say their foundation “disappears” or that a bottle empties faster than expected.
Cellulose, the plant-fibre material most blending sponges are made from, is genuinely thirsty when dry. Its cells are collapsed, like a flattened sea creature waiting to be dropped in water. Soak it properly and those cells swell, filling with water rather than product. What is left on the surface, once you squeeze out the excess, is a damp but not dripping tool that transfers makeup onto skin instead of hoarding it.
This is not a matter of taste or technique preference. It is closer to physics than to style, and it is the reason two people using an identical foundation and an identical sponge can get visibly different coverage depending on whether that sponge went anywhere near a tap first.
The Two-minute Soak, Done Properly
Run the sponge under lukewarm water until it has roughly doubled or trebled in size, then squeeze it out in a towel, not by twisting, which can tear the material over time. It should feel cool, heavy with water and springy, not dripping.
A damp sponge picks up less product per press, which means you apply in thin layers and build coverage where you actually need it, rather than committing your whole face to one heavy load. Dermatologists who study product transfer to skin have noted that thinner, layered application tends to sit more evenly than a single thick pass, partly because it gives you the chance to correct as you go.
A quick self-test: press a freshly soaked sponge onto a clean tissue. If it leaves a visible wet ring but no dripping puddle, you have the right level of dampness. Too wet and you will dilute your foundation on contact; too dry and you are back to the sponge eating your product.
Matching Shape To The Job, Not The Packaging Photo
The rounded end of a teardrop-shaped sponge is built for broad areas: cheeks, forehead, the flat plane of the jaw. The pointed tip exists for a genuine reason, not decoration: it reaches into the crease beside the nose and the inner corner of the eye without depositing a wide smear of product where you do not want one.
A flat-edged sponge, by contrast, tends to work well along the hairline and jaw, where a straight edge follows a straight border more naturally than a curve does.
The mistake most people make is using only the rounded body for everything, including fine detail work, which forces them to use a small dab of the wide surface and then blend it out clumsily by hand. Choosing the correct part of the same sponge solves most of what people believe is a “technique problem” and is actually a “wrong end of the tool” problem.
Bouncing Versus Dragging, And Why One Wins
Dragging a sponge across skin behaves like a windscreen wiper on a dry windscreen: it pushes product and moves whatever was already there, including the sunscreen and moisturiser layers underneath. That is what produces visible streaking, especially over dry patches.
A stippling or bouncing motion, pressing straight down and lifting straight back up, deposits product without disturbing the layers beneath it. It takes longer than a single swipe, which is exactly why people avoid it when rushing, and exactly why rushing produces patchier results.
A cosmetic chemist would describe this in terms of shear: dragging applies lateral shear force that can lift product that has not yet set, while bouncing applies mostly vertical pressure that leaves the setting process undisturbed. You do not need the vocabulary to use the method. Set a timer for sixty seconds on one cheek using only bouncing motions, then compare it with your usual technique on the other side under the same light. Most people notice the difference immediately.
Where Cheap Technique Costs More Than The Sponge Itself
It is tempting to blame a low-cost sponge for poor results, but the material itself rarely explains patchiness on its own. What usually goes wrong is skipping the soak, overloading the sponge with product in one go, or using the same worn edge for every task until it has gone flat and dense.
A flattened, compressed sponge, however new it once was, stops bouncing back the way a fresh one does, and a sponge that has lost its spring cannot apply product evenly no matter how carefully you move it. Squeeze your sponge gently: if it does not spring back to its original shape within a second or two, it has lost the structure that made it useful.
Another common shortcut is using a single sponge, wet or dry, for foundation, concealer and powder in the same session without rinsing between steps. This is less about hygiene and more about performance: dried product residue inside the sponge changes how much of your next layer it absorbs, which reintroduces the exact unevenness a fresh sponge was meant to prevent.
Cleaning Without Wrecking The Material
A mild, fragrance-free soap or a dedicated sponge cleanser worked through the material under lukewarm water, then rinsed until the water runs clear, is sufficient for most sponges. Hot water can degrade the cellular structure over repeated washes, so lukewarm is the safer habit.
Squeeze rather than wring, and let the sponge air dry fully before it goes back into a closed container. A sponge stored damp in an airtight case is, in practical terms, a small closed environment that bacteria find agreeable, which is why public health guidance on cosmetic tools generally recommends drying tools fully and washing them at least once a week with regular use.
Colour staining after washing is largely cosmetic. A sponge that still smells clean, still bounces back to shape and still leaves no residue on a clean tissue when pressed is still doing its job, whatever shade it has turned. The stain lives in the surface fibres, not in the tool’s ability to perform.
Judging When A Sponge Is Actually Finished
Three signs matter more than colour: smell, texture and tearing. A faint sour smell that returns soon after washing usually means product and bacteria have worked their way into the sponge’s core, past what surface cleaning reaches. A texture that has gone gritty, dense or permanently compressed will not bounce back, however you wash it. Any tear or crumbling edge means small pieces can shed onto skin during use.
A sponge used two or three times a week, cleaned weekly and dried properly between uses, commonly holds up for around three months before one of these three signs appears. Daily use shortens that considerably. None of this is a fixed rule, since water hardness, storage conditions and how heavily you load the sponge all play a part, but it gives a reasonable checkpoint rather than a guess.
The self-test here is simple: press the sponge firmly between two fingers. If it springs back cleanly, smells of nothing but soap, and shows no tearing at the edges, it still has useful life left in it.
What Actually Matters Versus What Is Marketing Language
Density, shape and how a sponge behaves once wet matter far more to your finished makeup than the marketing terms printed on the packet. Words like “premium” or “professional-grade” describe positioning, not performance, and are not measurable claims about how the sponge absorbs or releases product.
What is measurable, and worth checking before buying, is how much a sponge expands in water, since that expansion is what determines how little product it wastes. A sponge that barely changes size when wet will behave more like the dry sponge described earlier in this piece, regardless of what its packaging promises.
Colour of the sponge itself has no bearing on performance. Neither does scent, which is sometimes added to disguise the smell of the material and tells you nothing about how it will apply foundation. If you are choosing between two sponges in a pharmacy or a beauty retailer, the practical test is the one you can do in the shop: press it gently. A sponge with good structural memory will already start to spring back even from a dry, packaged state.
Key Takeaways
A sponge routine that holds up through a full day comes down to three habits repeated consistently: soak the sponge until it has properly expanded before any product touches it, apply in thin bounced layers rather than one heavy drag, and judge the sponge’s condition by its smell, spring and structure rather than by how stained it has become. None of this requires a particular brand, a particular price point or a particular shape, only the discipline of doing the same three steps each time.
A Quick Checklist For Your Next Application
- Soak the sponge under lukewarm water until it has visibly doubled or trebled in size.
- Squeeze out excess water in a towel; it should feel cool and springy, never dripping.
- Use the rounded body for cheeks and forehead, the pointed tip for the nose and eye area.
- Apply with a bouncing, stippling motion, not a dragging swipe.
- Rinse between different products in the same session rather than reusing residue.
- Wash weekly with a mild, fragrance-free cleanser and dry fully before storing.
- Retire the sponge at the first sign of a lingering smell, lost spring or torn edges.
This article is general information and does not replace advice from a dermatologist or other qualified professional.
Individual results vary depending on skin type, technique and product used.