
Zofia Nowak, Staff Writer.
You are standing at the bathroom mirror with four half-used brow pencils in the drawer behind you, none of them quite right, and a gel you bought in a hurry before a wedding that has since gone tacky and clumped. The question you actually type into a search bar at eleven at night is not “best brow pencil” but something closer to “why does my brow pencil look fake by lunchtime”. Here is one fact worth knowing before you spend another cent: brow hair does not grow straight up or straight across. It grows in a fan, usually at a steep angle near the nose and almost flat near the tail, which is precisely why a pencil held like a crayon, pressed straight down, draws a line your own hair never would. Specialists who assess these products professionally are not looking at packaging claims first. They are looking at the tip shape, the pigment load, the wax-to-oil ratio, and how a formula behaves against the particular texture of real brow hair, coarse or sparse, pale or dark. This guide walks through what they actually check, in the order they check it, so that the next time you stand in front of a pharmacy shelf or a Douglas counter, you are reading the product the way they do rather than the way the packaging wants you to.
- Shape beats shade: a slightly wrong colour is forgiving if the strokes follow your own hair’s direction; the right shade applied in the wrong direction still looks drawn-on.
- Gels and pencils solve different problems: a gel holds existing hair in place, a pencil adds hair that is not there, and most people actually need a little of both rather than one miracle product.
- Daylight is the only honest mirror: pharmacy fluorescent lighting and shop spotlights shift how a pigment reads, so the real test happens by a window, not at the counter.
Finding The Shape Your Own Face Already Has
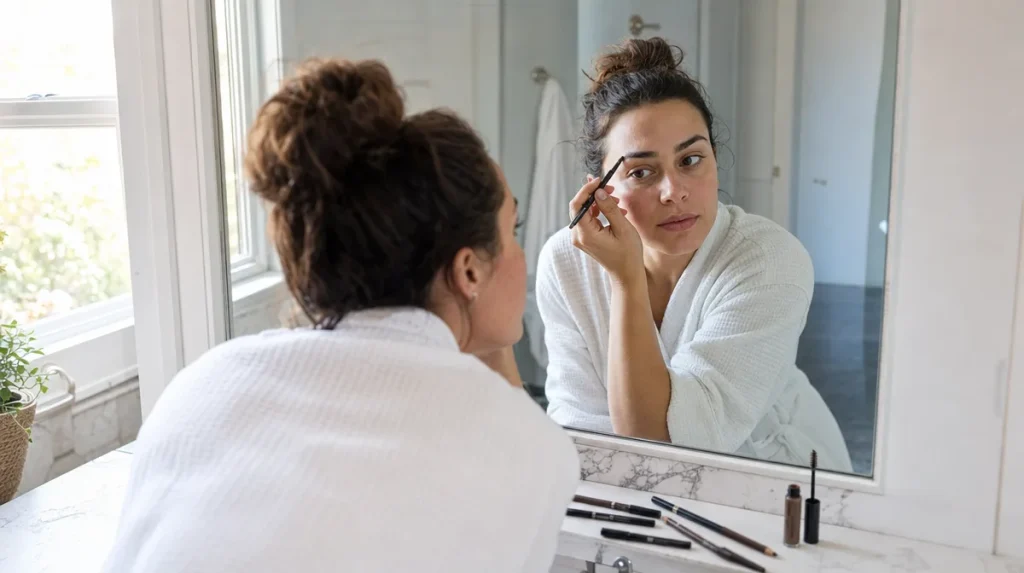
Before any pencil touches skin, the people who assess these products start with bone structure, not colour charts. The brow sits on a ridge, and that ridge has a natural high point, usually somewhere above the outer edge of the iris when you look straight ahead. A specialist will check whether a product’s angled tip can actually follow that ridge, or whether it is so thick it can only draw a flat block across it.
Think of it the way a hairdresser thinks about a fringe. A fringe that is copied wholesale from a photograph, without reference to the forehead and hairline underneath it, rarely sits right on a different face. Brows work the same way: a shape borrowed from a tutorial, rather than built from your own bone structure, tends to look pasted on by mid-morning.
The simple self-test here takes under a minute. Hold a thin pencil or cotton bud vertically against the side of your nose, in line with the inner corner of your eye: that is roughly where your brow should start. Angle it from the base of your nose through the outer corner of your eye: that is roughly where it should end. Anything you draw outside those two points is working against your own anatomy, however good the formula.
What A Pencil Actually Does Versus What A Gel Does
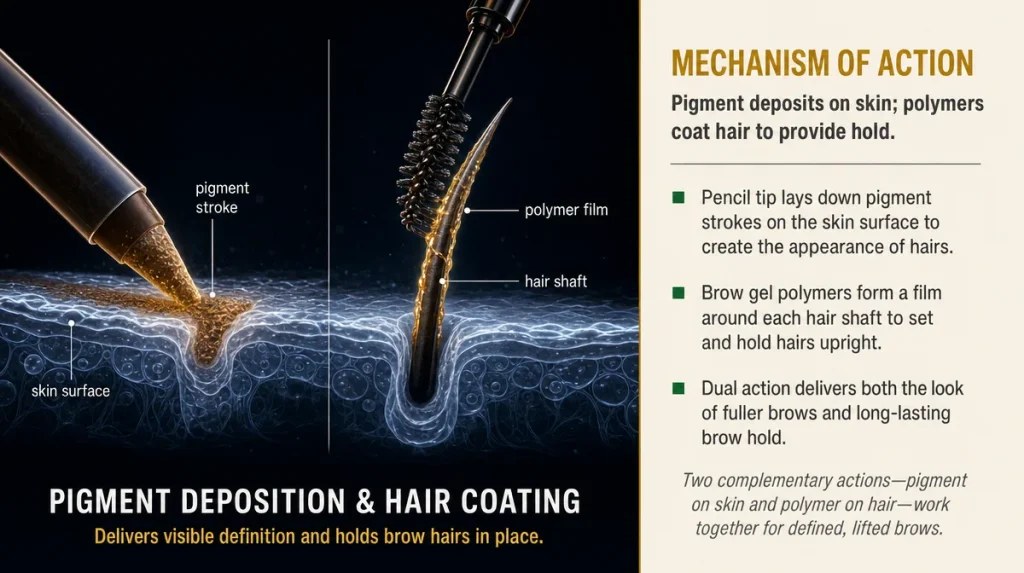
The two formats are solving different problems, and confusing them is the single most common reason a brow look falls apart by the afternoon. A pencil, usually a blend of waxes and pigment pressed into a thin core, is designed to deposit short, hair-like strokes onto skin or onto existing hair. It is filling in gaps.
A gel, by contrast, is closer in principle to the hair gel you might use on your scalp hair: a polymer film former, often discussed in formulation circles presented at International Federation of Societies of Cosmetic Chemists congresses, that dries onto the hair shaft and holds it in a set direction. It does not add hair. It disciplines the hair that is already there.
A useful household comparison is a garden hedge. If the hedge has bare patches, trimming it harder will not fill them in, you need to plant more. If the hedge is simply overgrown and leaning the wrong way, you do not need more growth, you need to train it. Sparse brows generally need pencil work first, gel second. Brows that are full but unruly often need only the gel.
Specialists assessing a gel formula will check how long the film stays flexible rather than brittle, because a gel that sets too hard tends to flake by evening, visibly shedding small white particles onto the cheek.
Reading The Tip Before Reading The Label
Pick up two pencils side by side and the difference that matters most is rarely the colour name on the barrel. It is the tip. A specialist will look first at whether the tip is a fine, slanted oval, roughly 1.5 to 2 millimetres across, or a fat, rounded cone closer to a standard eyeliner.
A slanted fine tip can vary the width of a stroke depending on the angle you hold it, thin near the tail, slightly wider near the arch, which is how real hair tapers. A rounded tip draws a line of consistent width regardless of angle, which is why it tends to produce the flat, drawn-on block so many brow critiques mention.
The mistake most buyers make is choosing a pencil by swatch colour on the back of the hand and ignoring the tip entirely. The back of the hand has no hair texture to interact with, so it tells you almost nothing about how the product will behave on a brow.
As a quick in-shop check, without opening sealed packaging, look at the tester if one is provided and draw three short strokes at different angles on the back of your wrist. If all three strokes come out the same width, the tip is rounded, not slanted, and you are better suited to it for filling gaps than for shaping a tail.
Matching Colour In Daylight, Not Shop Light
Fluorescent lighting and warm spotlighting both distort how a pigment reads, and testing panels coordinated through bodies such as Euroconsumers, which runs the shared laboratory programme behind Test Achats, Altroconsumo, OCU and DECO Proteste, have long noted that colour perception under artificial light is one of the most common sources of a mismatched purchase.
The practical rule specialists use is simple: never finalise a shade decision under shop lighting alone. A pencil that looks ash-brown under a cool pharmacy light can read distinctly red or orange once you step outside, because most fluorescent tubes skew the colour spectrum slightly cooler than daylight.
If you are buying in person, from a Douglas counter, a Sephora unit or a Notino stand, ask to step toward a window or the shop entrance before deciding. If you are buying online, from Lookfantastic, Cult Beauty, Zalando Beauty or your national Amazon storefront, check whether the product listing shows a swatch photographed in natural light rather than only a studio shot, and read a handful of reviews that mention how the shade looked after a day rather than straight out of the packaging.
As a general guide, most brow specialists recommend choosing a shade one level lighter than your natural hair colour if you have dark hair, and one level darker if you are naturally blonde, because brow hair itself is rarely a flat match to the hair on your head.
The Mistakes Almost Everyone Makes
The most frequent error is solid fill: colouring the entire brow in as one even block, tail to front, with no variation in pressure. Real brows are denser in the middle and thinner at both ends, so a solid fill reads instantly as makeup rather than hair.
The second mistake is a hard outer edge. Many people draw a firm line along the top of the brow to define it, when in fact the top edge of a natural brow is soft and slightly irregular, made of individual hairs rather than a drawn boundary. Specialists tend to recommend working the product in with short upward flicks rather than one continuous line.
The third mistake is skipping the tail entirely, or stopping it too short. The tail is the part of the brow that frames the eye and lifts the whole face, and an unfinished tail is one of the more common reasons a full face of makeup still looks unbalanced by the end of the day.
Finally, there is the layering error: applying gel before pencil, which pushes hairs in a fixed direction before any shaping has happened, forcing you to work the pencil against hair that is already set the wrong way. Pencil first, to shape, then gel, to hold the shape, is the order most specialists follow.
How Long A Brow Product Should Realistically Last
Wear-time claims printed on packaging are rarely independently verified in the way they sound. A 2021 comparative study in the Journal of Cosmetic Science, testing a panel of long-wear brow formulas over a twelve-hour period on forty participants, found that visible fading of more than 20 per cent typically began between six and eight hours after application, regardless of whether the product was marketed as twelve-hour or twenty-four-hour wear.
What this means practically is that “all-day” claims should be read as a starting point for comparison between products rather than a literal promise. A product that holds its shape for eight hours in daylight and normal humidity is performing reasonably well by most laboratory standards, European or otherwise.
The more useful check, specialists suggest, is not total duration but failure pattern. Does the product fade evenly, so the brow simply looks softer by evening, or does it flake and migrate, leaving small dark specks under the brow bone or on the eyelid. Even wear is a cosmetic limitation. Migration is usually a sign the wax or polymer base is unsuited to oilier skin, and switching formula type, from a creamy pencil to a drier, more fibred gel, often resolves it.
If you want to judge this for yourself before committing to a full-size product, apply it in the morning and photograph your brows at midday and again before you leave work, in the same light each time, and compare the three images side by side rather than relying on memory.
What Actually Matters Versus What Is Just Marketing Language
Packaging copy on brow products leans heavily on words like “clinically proven”, “dermatologist-developed” or “instant volumising fibres”, and Cosmetics Europe, the Brussels-based trade association that issues Europe-wide guidance on cosmetic labelling, has repeatedly noted that such phrases are not standardised terms with a fixed legal meaning, which is why two products can both claim clinical proof while describing very different levels of testing.
What tends to matter more in practice is the ingredient list itself. Fibres, when present, are usually short rayon or nylon strands suspended in the formula to physically bulk out sparse areas; they work mechanically rather than through any active ingredient, which is worth knowing because “active” language on the box can otherwise sound more clinical than it is.
Film-forming polymers, the ingredients doing the actual holding work in a gel, are worth recognising on a label even without memorising chemical names: anything ending in “-mer” or described as a “copolymer” is generally doing that job. A short ingredient list with one or two such polymers, paired with a wax base for a pencil, is often a more reliable sign of a considered formula than a long list of botanical extracts included at trace, cosmetically insignificant levels.
Fragrance-free labelling is worth checking for anyone with sensitive skin around the eye area, since this is one of the more reaction-prone zones on the face, a point consistently raised in guidance published by the European Academy of Dermatology and Venereology.
A Sixty-second Self-test Before You Commit To A New Product
Before buying, or before deciding a product already in your drawer deserves another chance, run this short check by a window in daylight.
First, draw three strokes on the back of your hand at different angles, as described earlier, to judge the tip. Second, apply a small amount along one real brow and walk to a window: does the colour look warmer, cooler, redder or greyer than it did under shop or bathroom lighting. Third, rub the inside of your wrist gently across the applied area after it has set for two minutes: does colour transfer, which suggests a formula that will likely transfer onto a pillow or eyeglass frame during the day. Fourth, check your reflection from a slight distance, roughly an arm’s length, rather than close to the mirror, since brows are judged by other people from a distance, not close up.
If a product passes these four checks, in daylight, with your actual hair rather than on the back of your hand, it is far more likely to perform the way you expect once you leave the house than any claim printed on the packaging.
Key Takeaways
- Shape your brow around your own bone structure first, using the nose-and-eye alignment check, before worrying about colour.
- Match pencil or gel type to your actual need: pencil fills gaps, gel disciplines existing hair, and most brows benefit from a little of both, pencil before gel.
- Judge colour and wear only in daylight, never under shop or bathroom lighting alone.
- Expect visible softening within six to eight hours even from long-wear formulas; judge a product by how evenly it fades, not whether it fades at all.
- Read the ingredient list for film-forming polymers and fibres rather than relying on marketing phrases such as “clinically proven”, which carry no fixed standard.
A Quick Checklist For Your Next Shop
- Check the tip shape first: slanted and fine for shaping, rounded and soft for filling.
- Step toward natural light before finalising a shade, in shop or online review photos alike.
- Apply pencil before gel, never the reverse, to avoid fixing hair in the wrong direction.
- Use short upward strokes rather than one solid line or block of colour.
- Do not skip the tail of the brow; it does more for facial balance than the front third.
- Test wear by comparing midday and end-of-day photographs in the same light, rather than trusting memory or the packaging claim.
This article is general information, not a substitute for advice from a dermatologist or pharmacist about your own skin.
Individual results vary depending on skin type, hair texture and how a product is applied.